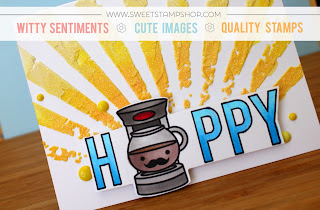
Hello there Sweet Stamp Shop fans! I wanted to share a quick card with you that doesn't involve much but some stamping and colouring. This is a fun way to make fast cards when you're in a pinch for simple but great!
I started by picking one simple image. You can do this with a number of Sweet Stamp sets. Look through your stash and find an image that you can repeat and color to create a great focal point. I stamped my images and overlapped them a bit. Don't worry about overlapping! You can color them in and blend the colours or you can stamp the images in different colours and leave them plain inside. That can be a fun look too. For this card I decided to color in the balloons to make more of a statement.
I did some blending with my Copic Markers. You do NOT need to own Copics for colouring. You can blend using any alcohol markers plus you can also get a great blend using coloured pencils. I started with the mid-tone color, then the darkest color, then went over it again with the mid-tone and then finally the lightest color. If you are using color pencils, you can get a great blend by colouring in small circles. This will prevent those lines you get when you usually color.
I also used a darker color to add some dot details to my bear as well as a lighter pink color to do the cheeks and ear. The lighter tones of alcohol markers will removed the dark color kind of like an eraser. Then it left a little pink tone in its place.
The colouring went together fast! This is the kind of card you can make up while watching TV or chatting with some friends. Stamp out a few panels and then get to colouring! I also added my sentiment from my very favorite Sweet sentiment set called Happy Birthday. It has so many great fonts. If you don't have this one yet, you really should check it out! I finished off the card by trimming it down a bit, adding it to a card stock base and adding a slew of enamel dots.
Thanks for joining me today. I hope you feel inspired and learned a few things along the way! Now get going and get stamping!!
Also, be sure to check us out on Instagram. There is always something inspirational coming your way plus you can chat with other Sweet fans and the DT is there to answer any questions you may have.
until next time,
xoxo
k


