Sep 29, 2014

Coffee Lover's Blog Hop: Sweet Stamp Shop

Hey there! Today I am participating in the Coffee Lover's Blog hop that is being hosted by Chaitali Narla and Amy Tsuruta!  They are having some coffee inspired crafting and some amazing giveaways too, including some goods from Sweet Stamp Shop! So head on over to Chaitali's Blog to check out the details and get started!


Some of us from the Sweet Stamp Shop DT have created some coffee loving cards to share with you today. Here is my little contribution:


I started with Easily Distracted and some fussy cut images from the newly released Coffee Town and set to work.
(Sweet Stamp Shop is giving away a Coffee Town set in this blog hop, so be sure to check it out!)


I opted to keep things pretty simple. Mostly stamping on my card base in black and popping up the Coffee Cups/Sentiments and colouring them for more flash appeal.

I added some Wink of Stella to my bling and my card was done. It pretty much made itself, which is great on this crazy Monday!


I hope you get a chance to head over and participate in the hop. Are you a coffee junkie AND a paper crafter ? Then this hop is for you! There are a TON of prizes to win and great coffee inspiration! So have fun and thanks for checking in with me today.

This week I am working on World Card Making Day cards. What about you? I have never participated before, so I thought it was high time I did! You can't be a card maker and let that day pass without some sort of recognition, right? Well, that's what I am thinking anyway. So check back for some of that plus there will be the Paper Wings Productions Blog hop and monthly challenge coming up. Lots more crafting to be done this week!

Hope you have a good day!
Until next time.. just keep on stamping
xoxo
k

Sep 27, 2014

Sweet Stamp Shop Coupon Code for YOU!


Hey there friends. I am stopping in real quick to share a Sweet Stamp Shop discount with you! Any of you who read this blog (or are friends with me on FB) can get FREE shipping on card kits over at Sweet Stamp Shop! (Now if we haven't connected yet on FB, now is a great time! Just jump on over and like my page. And voila!)

They just released a new kit this week and it is party time! And nothing says party like free stuff, right?
Check it out:

It has a stamp set, 20 cards and die cuts too!
So here is the deal... use THIS code when you check out: FREEKS (as in Free + KS.... not freaks ;) and you can get Free Shipping (USA only) OR $3.50 off shipping (My international friends!)  You can even add other stamps to your cart and still get it shipped as long as you BUY A KIT!

So that's a pretty good deal because these card kits have been revamped to include MORE gorgeously printed cards AND a stamp set all at the same original price of $15.00!!

I just worked with their Ahoy Kit, which was so much fun. (I have a post coming next month to show you.. yes I know, that's not soon enough!) Take a look:


All the cards are printed in a small shop in California. So you can imagine that quality is everything when a small business wants to grow! And I can say this: The cards are great quality. I have seen them, touched them and used them myself! They aren't those flimsy, faded die cut papers or patterned paper. These are 3"x4" and 4"x6" printed cards with amazing designs on them. And I am usually not a card kit person, but working with these ended up being so effortless and fun that it actually impressed me!

Anyway, I don't have to sell you on them, you can see them all HERE at the shop. Take a look at the 4 they have out already. And check out the blog to see them in action from the many past designers.

I really enjoy them, and I think you will too. And if you want to shop, head on over with the code! It's a great way to end your week! But get moving because it won't last long!

That's all for now! It's 2:30 in the morning here (ah... to live internationally when half the world is finally waking up and I have to go to bed!) But I must sleep so I can take care of littles in the morning. Oh, that morning... it comes so fast!


Thanks for checking in with me today. Have a good one!
xoxo
k

Sep 26, 2014

Have You Seen?


Hey there... Happy Friday to you!

Today marks the first ever post of this kind here on thekristiesessions.  I think I am going to start a little post every once in awhile about things I love, things I have seen around that I want and other stuff that may or may not be craft related. So here goes... Welcome to this Friday's Have you seen?


  • Do you like stamping backgrounds? I love making a OSW (one sheet wonder-one page of stamped pattern used for multiple cards). This website is a great place for colour combos and print inspiration.
  • September marks the STAMPtember sales over at Simon Says Stamp. They have some great stuff just out. Every year I am torn between a handstamped card or a photo card. This year I going to try THIS for my Christmas cards. Mass production here I come!
  • Sweet Stamp Shop comes out with their newest card kit this week. Head over to their Facebook page to check it out! They are giving away free stuff too! And don't forget there will be a new stamp release coming up in October. Lots of Sweet stuff to be seen.
  • CutCardStock.com is having some discounts right now that might get you into the fall spirit. They have a wide variety of amazing products. Do you do CutCardStock? I am new to them, but am in LOVE! They have some amazing things. I especially love their metallic card stock. Lots of great shimmery colours at a great price.
  • Right now these are my favourite sentiment die cuts. (which I am sure you have noticed ;) The love affair has been going on for awhile... it's not going to stop any time soon. 
  • I have been really inspired by black and white lately. Do you Pinterest? It's a great place to go for lots of inspiration. Two of my favourite pins right now are HERE and HERE. These would make great cards, don't you think?
  • Don't forget World Card Making Day is coming up fast!! You can create to your hearts content AND enter a contest HERE. I'm hoping to get some time in the next week to participate. You should too! Nothing helps you step up your crafty game like a contest, am I right?
  • And totally un-crafty related, anyone out there a Jane Austen fan?? I am completely addicted to this TV series HERE. It's older, and only 4 episodes, but really well done. I love crafting to it. In fact it's on a continuous loop here. I think the actors do a superb job, which means sometimes I may do more watching than crafting when it is on. Jonny Lee Miller plays Mr. Knightly, (ummm, handsome!) If you like reading Jane, I think you will love watching this one!

Ok. That's it for this week. Have fun clicking around! Do you have something you love lately? Leave me a link. I love seeing what's out there. Crafty or not!

Thanks for stopping in today!
Until next time...
xoxo
k

Sep 25, 2014

CutCardStock.com: Paper Quilling


Hey there! Today I am over at the CutCardStock.com blog with a new project. Paper Quilling! It's a new technique for me, but something I think is so fascinating. Head on over to take a peek and maybe even try it for yourself! If I can do it, you can do it. Trust me!


Thanks for stopping in today. Be sure to check back on friday for a new something I am going to be starting up here. Just a little web tour once in a while to see what around, both crafty and non. A fun way to share things we like and things that we have spotted around the blogosphere!

Until next time... keep on crafting!
xoxo
k

Sep 22, 2014

Sweet Stamp Shop: Cut window Card

Hey Sweet peeps, happy day to you! Today I'm sharing another Sweet Stamp Shop card! Thanks for joining me today~

But first off, I have a semi-random issue I need help with.... I need a new crafting chair. After about 30 min of sitting at my computer, my keester is killing me! So my question to you is this... What chair do you use when you are crafting? Is there something out there that's comfortable, good for my back but doesn't look like Captain Kirk's chair from the Enterprise (or rival the size of the Enterprise!?) Seriously, what is it about office chairs?  They are nooooot attractive...big and clunky and space-age-y.  Am I right? Well that's what I think anyway. But something has to change for my hiney, and STAT! So if you could leave me a comment if you have a chair that you love and would like to recommend it, I (and my tushy) would really appreciate it. Thanks!

Ok, lets get started... here is my card. A little peek-y window for you:


Let's see what this card is made of, shall we?
First off, I trimmed a water-colour paper card panel and traced a circle die cut onto it. I then started stamping using this great set Elegant Flowers. I love this set because it's a bit different than the other style of Sweet Stamps you find in the shop and I think having different styles is a good thing! Don't even get me started on THIS amazing set. It has been used and used and used! It has so many different fonts and suits so many styles. I love that! Designing kudos Nicole!


Next I did some masking to stamp my other flowers and repeated it on the upper right hand corner as well.

Then I pulled out my Distress Inks. I love these babies! So glad they came out with these small cubes.  Their size helped me take the plunge and I'm really glad I did. They are really easy to use and don't take up a lot of space, which is great for me. And you still get plenty of colour and coverage. I used them to water-colour for this piece using a water brush. Squish your ink on your craft sheet and dip in your brush and paint away! This is a fun way to learn shading and colour combos. I'm still learning too as you can tell. That's what I love about this biz, there is always something fun to learn and a way to improve! Don't be intimidated by water-colour. It's a great medium! I love using Distress Inks more than anything else. I think I have tried every single medium and these works the best for me.


After I finished colouring, I sliced a big X in the centre of my circle and cut out the inside of the circle being sure to trim around the flowers. I trimmed the sides a little bit and rounded the corners. I added some Wink Of Stella to my flowers too for added shine.

I then stamped my sentiment onto my card base and popped up my water-colour panel over top. It frames the sentiment nicely! I LOVE this happy font.  It comes from Elegant Sentiments stamp set. And I guess they go pretty good together, right? In fact I just realized they had similar names! I love this sentiment set because of the size and style of the font. It can stand on its own and isn't a font i have seen around so that makes it extra special!


**Just a little bit of a side tip, after stamping the white sentiment, I went over the letters with a white gel pen to help it be more solid. The white ink I used, (while I do like it) always squishes out to where it looks more like an outline of the stamp and not a full stamp. Doesn't matter what stamps I use, it just likes to squish... Maybe I push too hard? I can get kinda crazy when I stamp!

Ok, and that's it!

Thanks again for joining me today. Be sure to check out the Sweet Stamp Blog this week. There is a new kit being released this week! There are more journaling cards to fall in love with and a great new stamp set. So check it out! Also, you can join in the party over on their Facebook page. Like the page so you get all the updates on new releases. Because, let me tell you.. October is coming fast and I know for a fact you won't want to miss it!

have a great week!
xoxo
k


Sep 17, 2014

The Card Concept #19

Hey there...Welcome !! So glad you stopped in. We have another challenge today over at The Card Concept. It's a colour challenge.

Check it out:


I'm up for clean and graphic for this challenge. My definition of clean and graphic means bold but simple. So I pulled out my favourite pigment inks... the Memento Luxe. Their colour is always so vibrant, and intense. I also dug through my stash for a graphic stamp  (MFT.)

I started on the right hand side to stamp leaving a little white border to help pull the eye down ward. I added some enamel dots. I originally had the red dots on the yellow stamping and the yellow dots on the red stamping but with the boldness of the stamps it was just too much for the eye to take in. So I switched them.

Now this was actually my second card. Here is my first... It just wasn't as bold as I wanted it to be ; )

On this I used the same idea but the stamps are from Jane's Doodles. I like how this one turned out too. In fact, if you want a simple card to whip up, this is the best way to do it. Pick 3-4 colours and one stamp and go to town!

Be sure to stop by The Card Concept to check out all the inspiration and to play along! We love to see what you create!
Thanks for stopping by
xoxo
k

Sweet Stamp Shop Coffee Card

Hey there! Long time no post, eh?!  Well, my husband and I celebrated out 14th wedding anniversary this last weekend and had a lovely trip to celebrate. It first started out as a jaunt to Vietnam but wouldn't you know... they wouldn't let us into the country!!! So.... after an entire day of flying we finally landed in KL Malaysia and spent our anniversary weekend there. We got back on Sunday but its been a few days getting my feet under me, and now I am here!! I have missed you!! I made this card up last week when I was playing around with new stamps and wanted to share it with out.

How many of you have friends that are coffee lovers?? I have a little coffee gift card/card for you to try out. It's super easy. All you need in some stamps and a bit of time.

Here it is:

This is a new stamp from the September Release over at Sweet Stamp Shop. But take a gander on the inside:


I used a Paper Smooches die cut to make my little glassine card holder. I used some older stamp sets for the sentiment inside. They are from Sparkle and Shine and Just The Basics.


Here's a close up. I actually used their digi stamps to make this front cover and then fussy cut the coffee cup out and popped it up for dimension. I just used my coloured pencils and my pencil blender to shade my colours, with it darker on the bottom and fading lighter at the top of the letters. I also used some glitter embossing powder on the edge to add a little sparkle.

That's all for today. Did you have a great weekend? Hopefully this week is starting out right for you.
If you haven't already, check out the new release from last week. HERE

Thanks for stopping by today!
k

Sep 11, 2014

Sweet Stamp Shop: Black Embossing

Hello Sweet Stamp Shop fans! Today marks another day of sweet stamping. Today I wanted to show you a little card that is all about embossing... On black card stock. thanks for joining me as I share some tips and tricks I learned along the way. Let's get started!

Here is my card:


My opinion on embossing and my first tip for you is to prep yourself! Embossing can move fast and it's always helpful to have your supplies at hand. I chose this sweet stamp set Kitty and dug through my collection of embossing powders to choose a few I liked. When I have a lot of colors to choose I like to do a varied "rainbow". As in, one color in the red family one in the blue family etc. This isn't necessary, especially if you want a more specific color palette, but it's usually a pretty good rule of thumb of you want a balanced color feel. So here are my supplies:

 
You want to start by prepping your card stock with an embossing buddie or anti static powder of some sort. I have his new one (to me) from EK Success. I've also used a bag filled with baking soda, it works pretty good too. My second tip is: Don't be shy! Get that powder on nice and thick because you can just wipe it off after and you would rather have the help now then have that powder everywhere (as I will show you soon)

Here is my first color... I stamped my image across the whole card being sure to not do it too much because I need to leave room for the other colors. I like to stamp in a loose set of 5 (like you would see on a game die) or 7. 

When you pour on your powder, don't go crazy. Just cover the sections you stamped and that will save you some headache.

Now with my blue powder, I had some fingerprints that took on some powder as you can see. No worries! You can just take a paintbrush and brush off the smudges. But just to be on the safe side, in between the colors you can put down some more anti static powder and be sure to wash your hands if needed! That's definitely something I need to do frequently. Sheesh, I can be so messy!

You can see my final card base all finished with being embossed! After you are done, you can take an eraser to the parts of the card that still have anti-static powder on it, if its not wiping off with your hand.

One of the other things I like to do is use this grid pad to stamp on. It gives my stamping a little extra cushion for a nice image but also I like to practice a bit before committing to a design. I stamped my kitty first with some milk and a dish and didn't like it, so when I stamped it on my cardstock I changed the configuration. But then I still didn't like it in the end and fussy cut everything instead. So you know, while I ended up with somethig totally different, prestamping did help flush out the design as I created. This has really saved me from hating cards when I am done!


I decided I wanted to mat my kitty image with a matching cardstock color but I didn't have anything I really liked. So I decided to make my own! I swiped my VersaMark ink pad along the edges of my white cardstock mat and dumped my powder color of choice on it.


And Voila! I heat set it to a nice blue color which will match my card base. In full disclosure I actually tried green first and didn't like it so just put some blue over it. Not too difficult! And in the lower right hand corner you can see where it got messed a bit. I just swiped the VersaMark again and re-embossed. Easy! And it gives a nice glossy shiney detail too.


One last embossing detail. I have these enamel dots, that I am sure you all have sitting in your stash. Do you ever design and find you don't have the color of dots you want? Because let's be honest, those things ain't cheap, at least not here in Singapore. So I just cut the plastic my dot was on and dipped that in the VesaMark and then the powder I wanted. And done! Now I have my own custom colored enamel dot and I didn't even have to go to the store to get it. I love that!

Ok, then all that's left is to assemble my card. I colored my kitty with Copics, stamped and hand cut my banner and popped it all up on dimensionals

All done! What do you think about today's project? Have you done a lot of embossing before? I would love to hear how you like to do it. Drop me a comment or ask any questions you may have. Embossing was a bit intimidating to me at first but the more I practiced the better it got and now I can't imagine NOT embossing at least once on a card. It's funny how that works.

Be sure to stop over at the Sweet Stamp Shop to see the new release from this week. And the DT are running a contest... the designer to have the most mentions from orders made win something sweet! So I am passing that on to you... If you place an order, be sure to mention my name in your order commetns and then come back to my ORIGINAL Sweet Release post and leave me a comment. If I win, YOU win! I will send you a sweet package in the mail all the way from Singapore. You have until Friday to get your purchases in for a chance for us both to win, so head on over!

Thanks for joining me and I hope you have a SWEET day!
xoxo
k


Sep 10, 2014

CutCardStock.com: Fall Card and a discount!


Hey there! Thanks for stopping in. Today I'm over at CutCardStock.com for a little fall creation.

You can take a little gander:

Head on over for a full tutorial! ALSO...This month don't forget to take advantage of their discounts! Check out the sale for black card stock AND all gold, orange and brown card stocks as well. They have an amazing array of styles, textures and paper weight that I am sure you will love. They are perfect for all your fall projects I KNOW you have been listing in your head. (Come on... admit it now ; )  In fact I would love to hear what you have on that list. What's very first?
I'm already dreaming up a fall bunting and little details for my Thanksgiving table!

This is my favourite time of year and when I lived in NY it was heaven! I remember the amazing array of leaves that adorned our trees in the back of our house. Sometimes I would trade our year round pool just to crunch through those leaves one more time!

Ok.. enough reminiscing, I can almost smell the leaves and feel the crisp breeze on my cheeks. Aaaaahhh! Thanks so much for stopping by!

xoxo
k

Sep 9, 2014

Sweet Stamp Shop September Release Day!


Hey there crafty peeps! Today marks the day of the newest released stamps coming from the amazing Nicole Rixon over at the Sweet Stamp Shop. And I am feeling so lucky to be apart of it all!

ETA: When you hop over to the Sweet Stamp Shop and place an order, be sure to mention my name in the order comments. At the end of the week, the designer with the most orders wins a crafty prize! But this is not all about me people... If I win, YOU win! Mention me in their order comments and then leave me a comment HERE, and I will put you in the running for winning a crafty package from little ol' me! We have until friday to win together! So get shopping!

I whipped up a few things to celebrate the day:

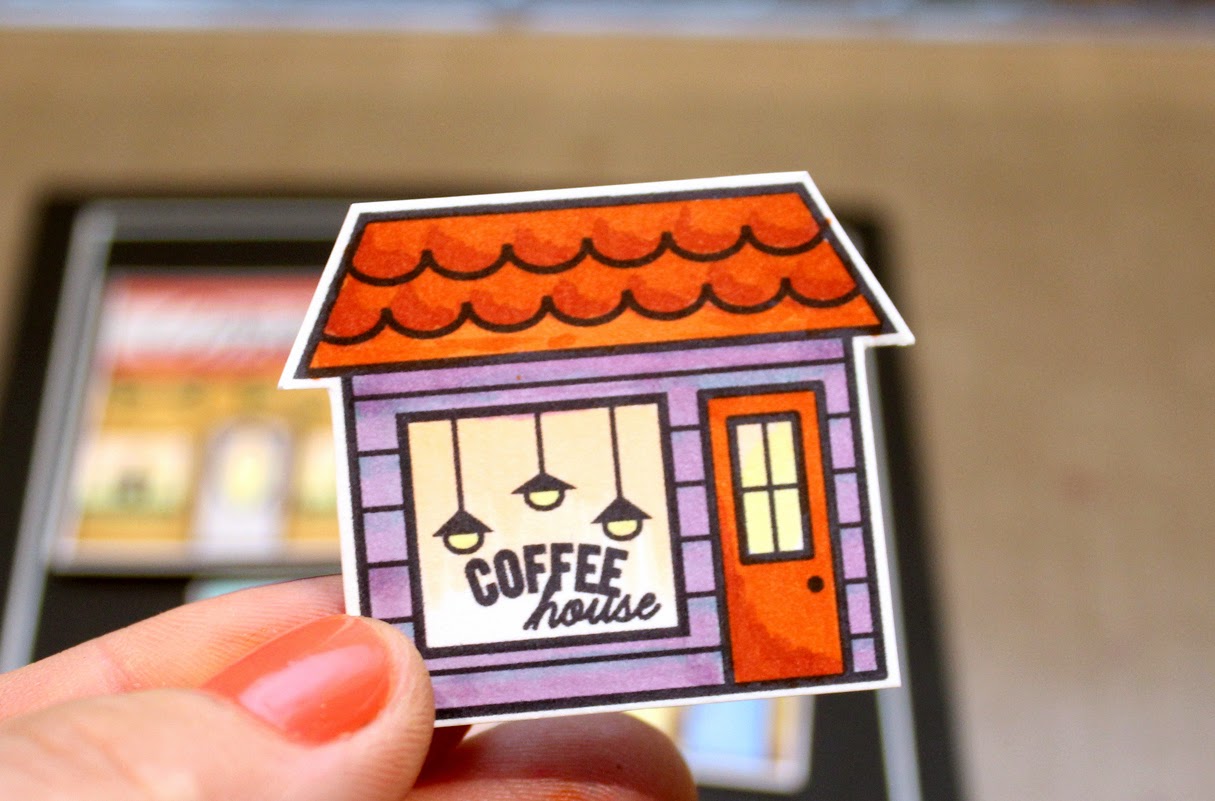
I Copic coloured and fussy cut my little shop houses which are from a few different sets being released today:

Even though these are from different sets, they all work so well together, don't you think?! This is one of the things I love about Sweet Stamp Shop stamp sets. Versatility!
And, I have a lot of stamps in my arsenal and there are so many big sets with these little bits and bobs that I never use. But not Nicole's designs.... I love the sizes of these sets. They are smaller but every bit is usable, and everything packs a big design punch, ya know?! That's just pure genius in my mind!

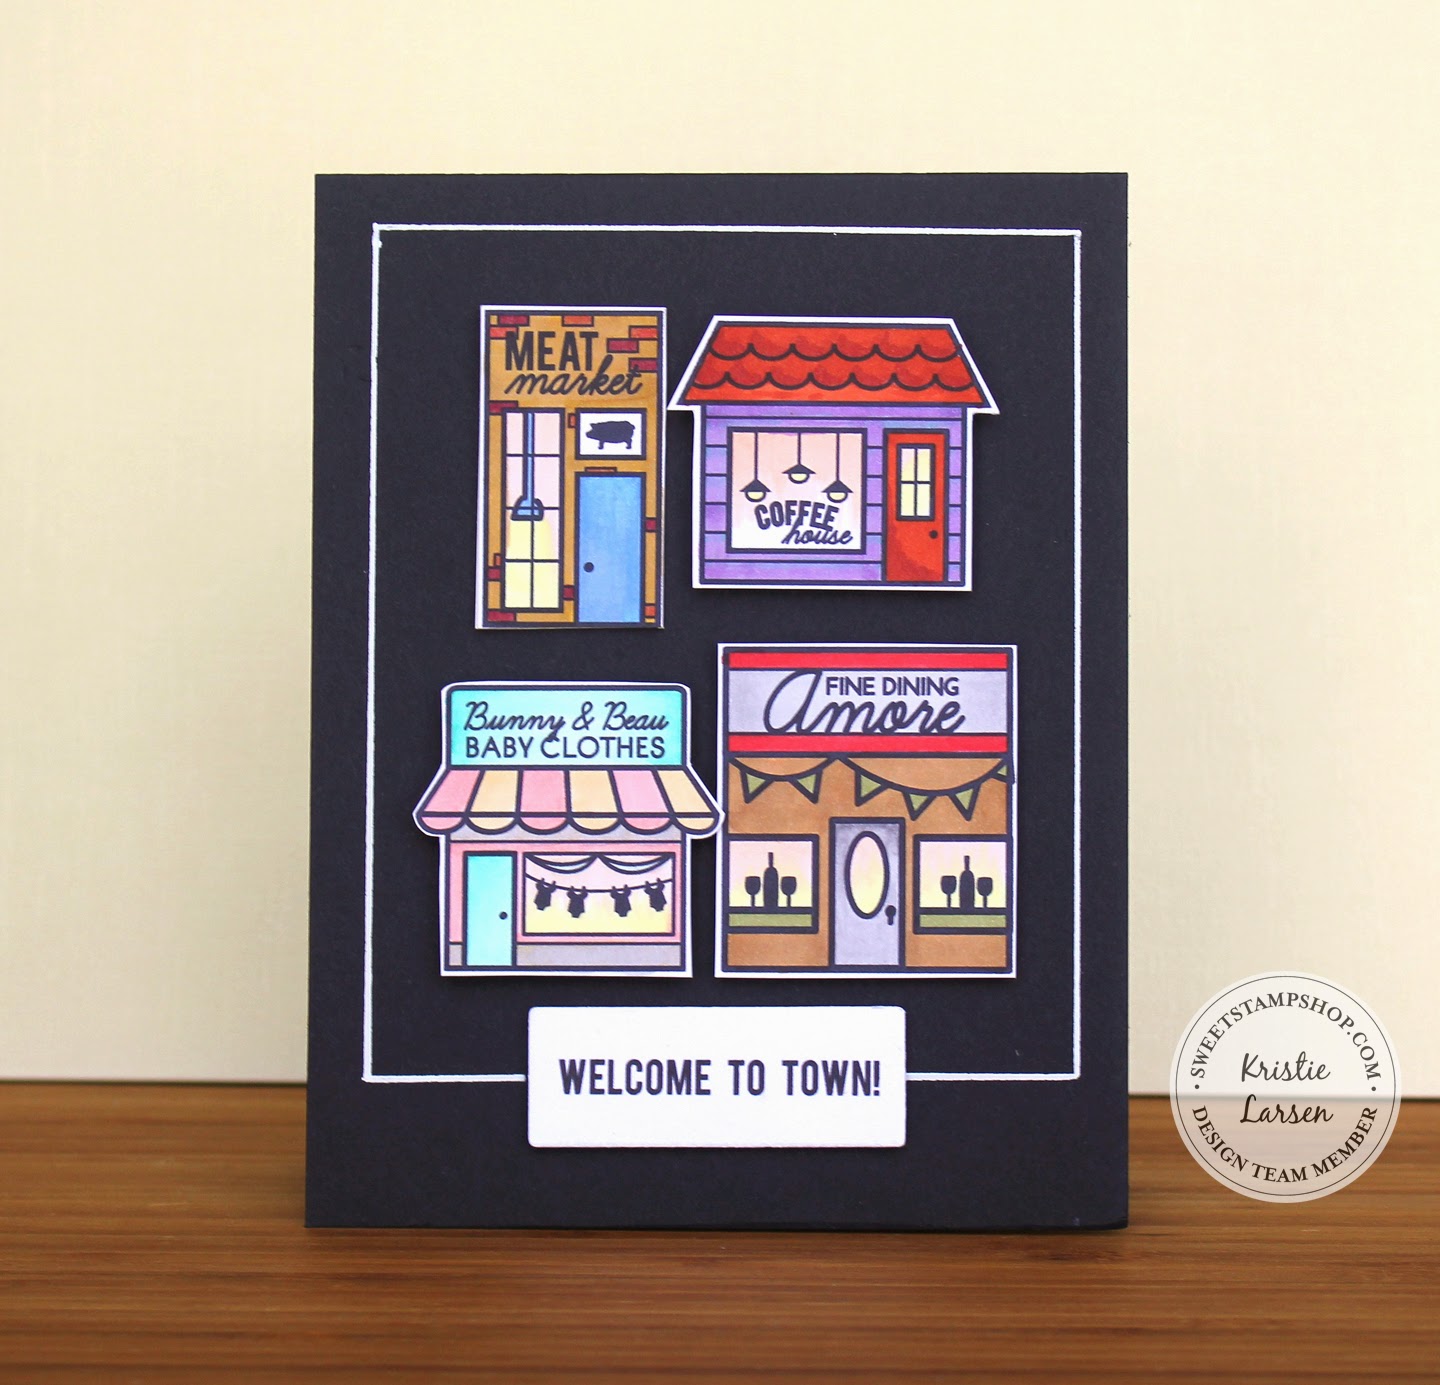
I wanted my houses to be dimensional but not all the same height and since my foam dots seem to lack in 'height variety' I decided to layer this Meat Market with just a few pieces of card stock. It made it dimensional but not as tall as the other shops.

When drawing my outline I used my T-ruler and a white gel pen from CutCardStock.com. This Uniball Signo white pen writes like a dream! I will NEVER go back to the other gel pen I was using. I was always so mad at that thing. Shaking it and banging it on my desk like a wild chimpanzee!

This lets the ink out nice and smoooooth like. But one thing to consider when you are doing this, remember to wipe off your ruler after each pass. Otherwise when you move your ruler around it will smear smear smear the ink like bad mascara after a good cry.

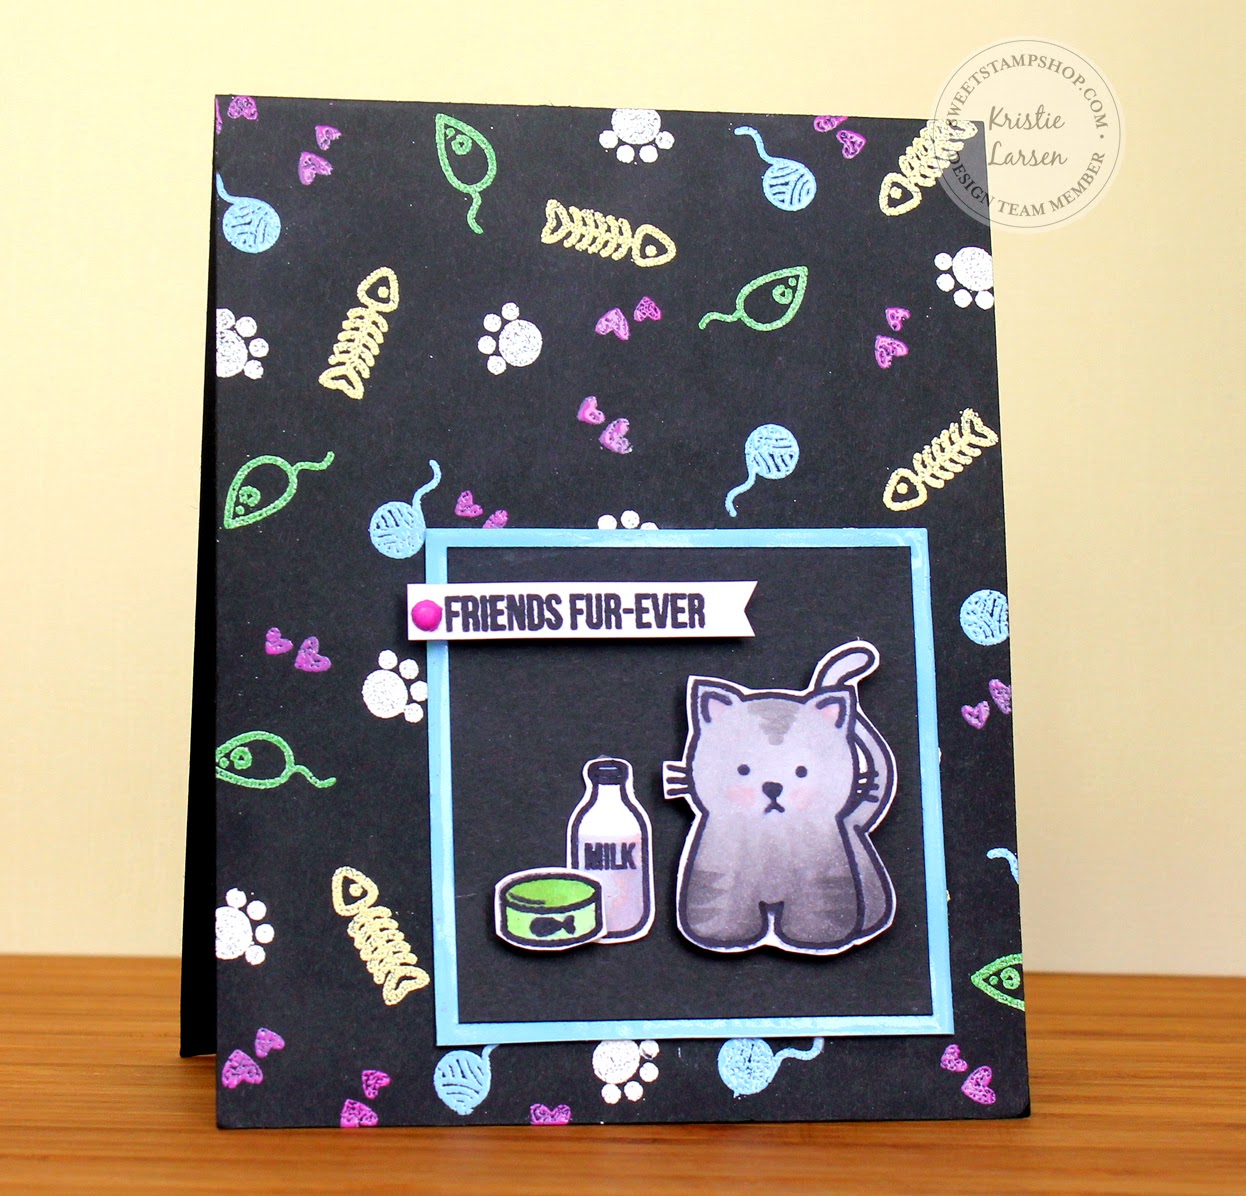
Ok, so here is my final card! Lots of fun shop houses to colour. Or as they say here in Singpore 'shop-shops'. Not to be confused with just regular shops ;)  I loved colouring these little babies, so I opted for a black card base to help make that colour pop.

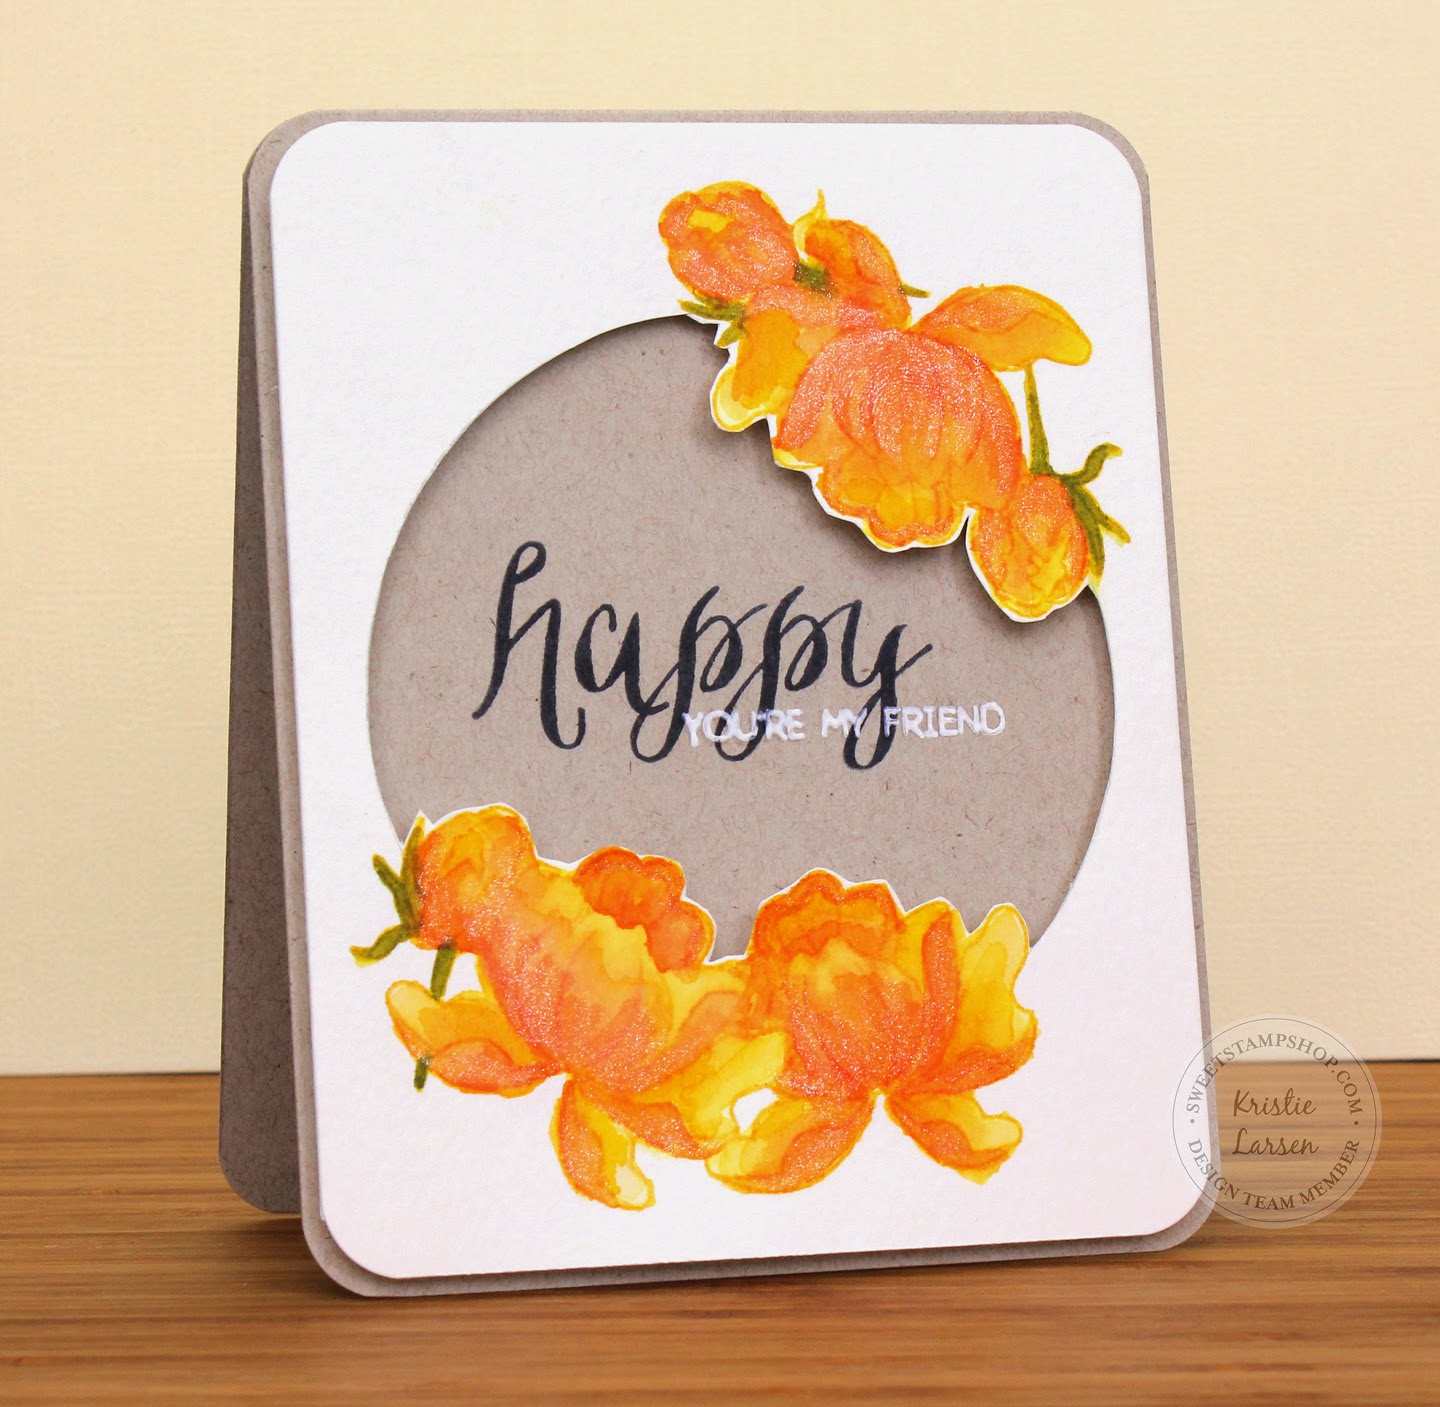
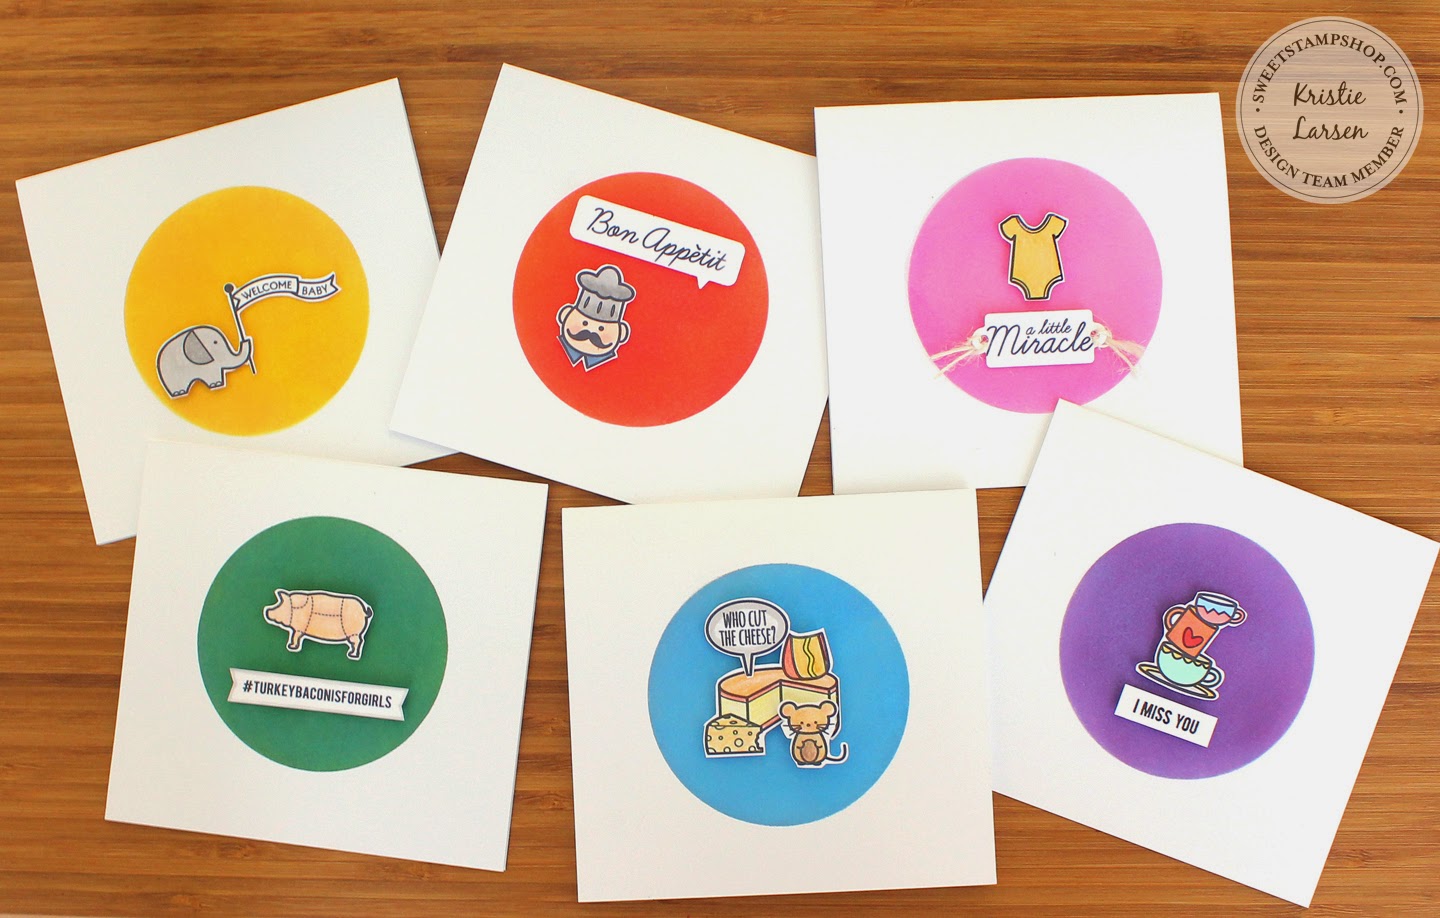
And just one more little project to share. I coloured and fussy cut a lot of the little images in these sets to create a set of 6 cards.  I created a circle mask with my 
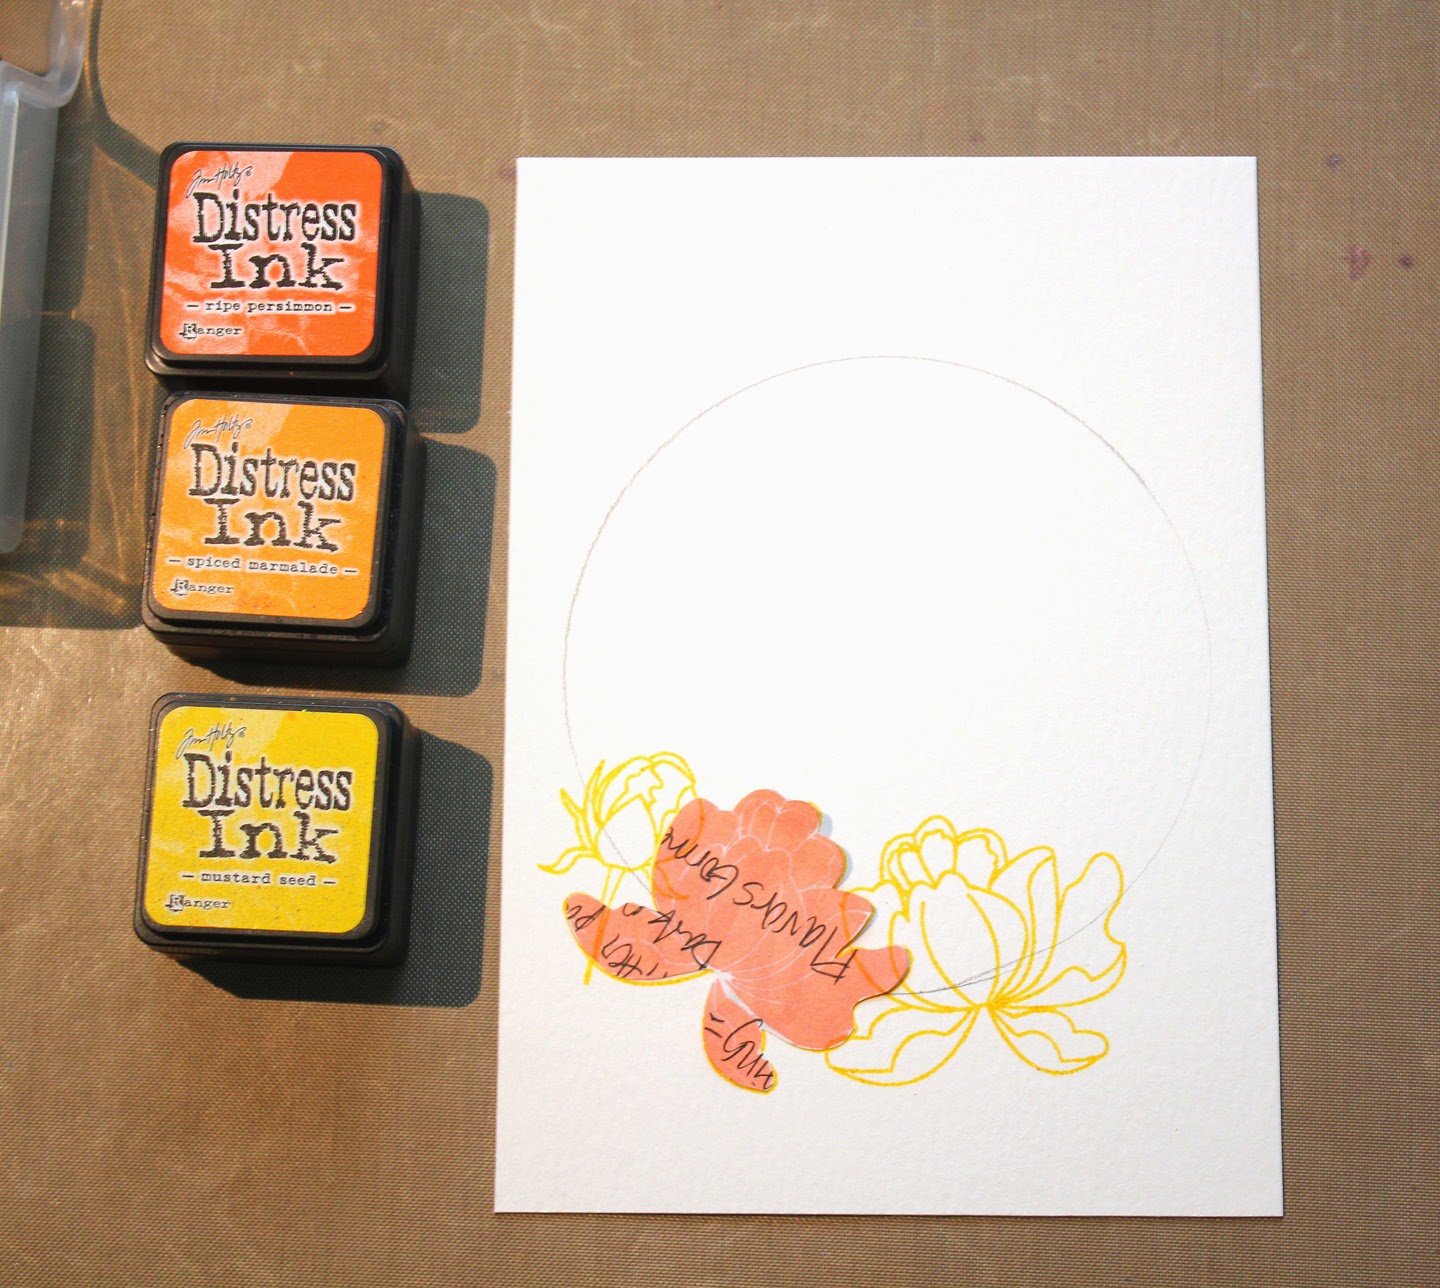
Spellbinder die cuts. I laid a few of the images inside the mask to be sure of the spacing. And actually I thought this one was too small so I went one size bigger.

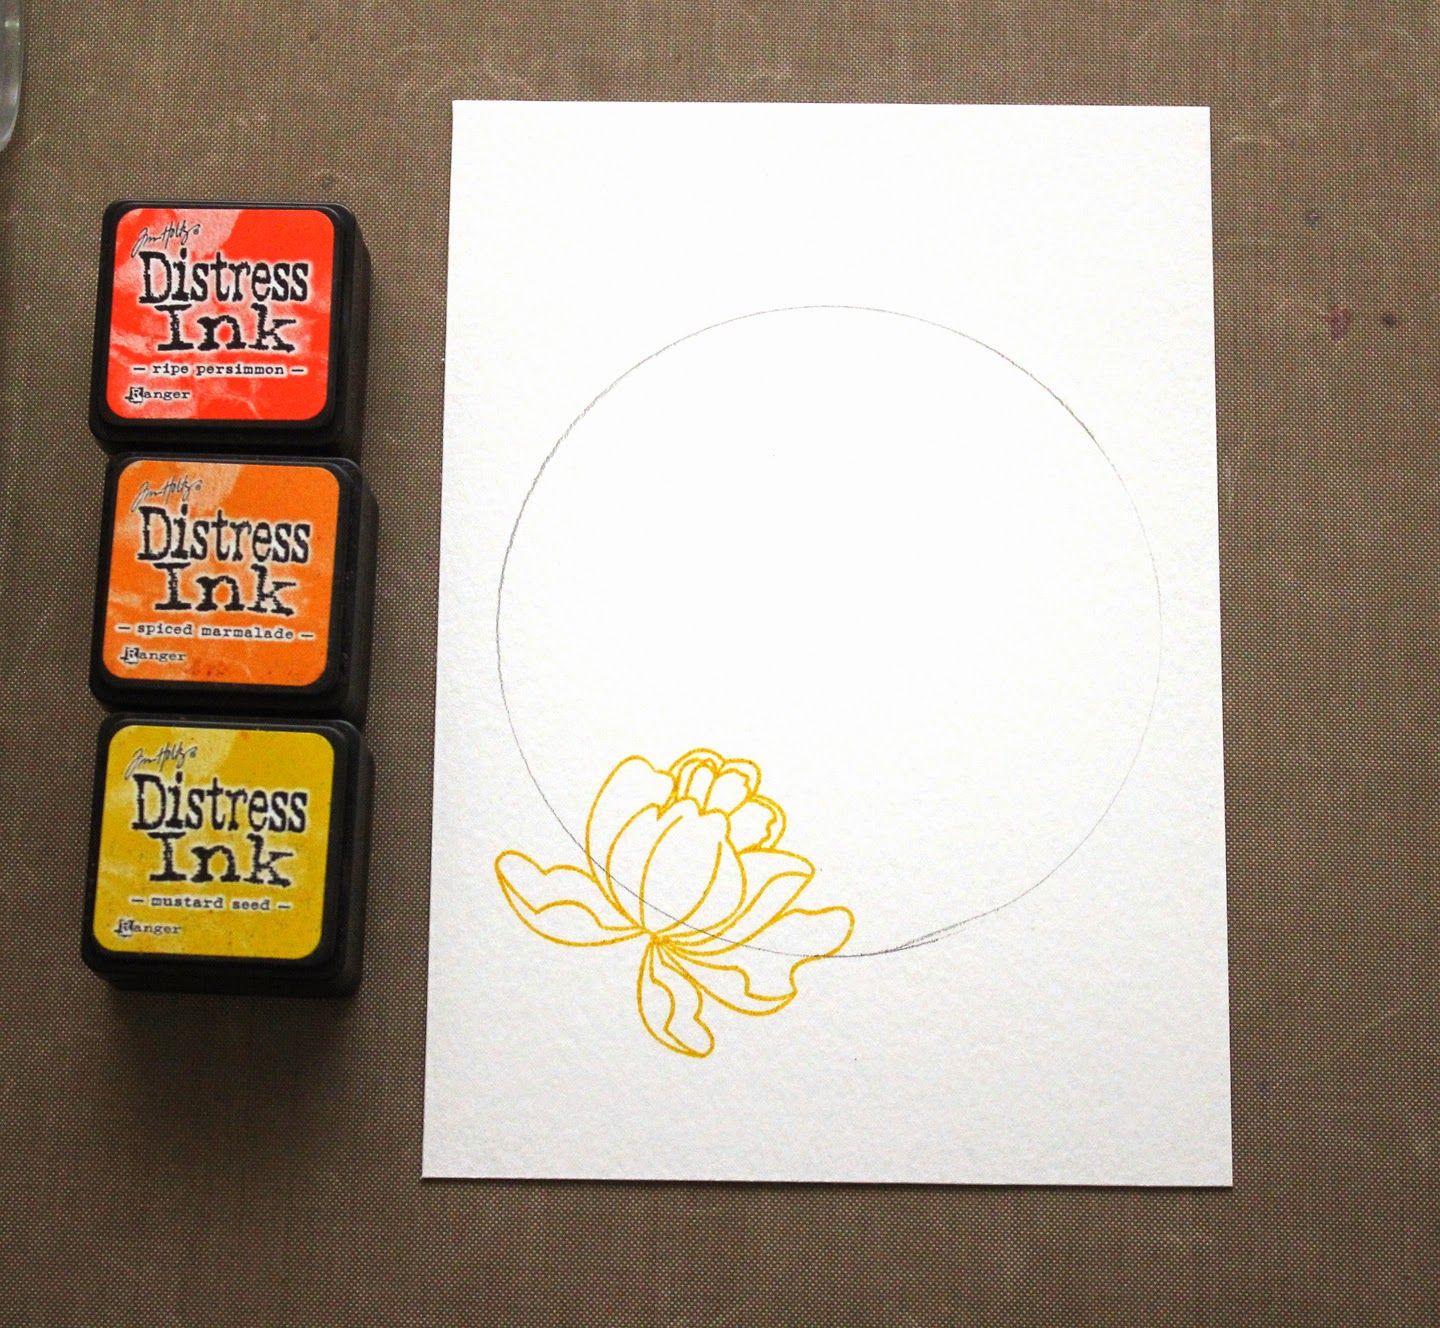
After securing the mask, I inked up my card bases with Distress Inks. I opted for 2 similar colours for each card. I wanted to give the colour more dimension and coverage. These cards measure 4.5 x 4.25.

So then after that, it was just a matter of colouring and cutting my little images and popping them up on the card base. This one features a sentiment from an older set: Just the Basics.

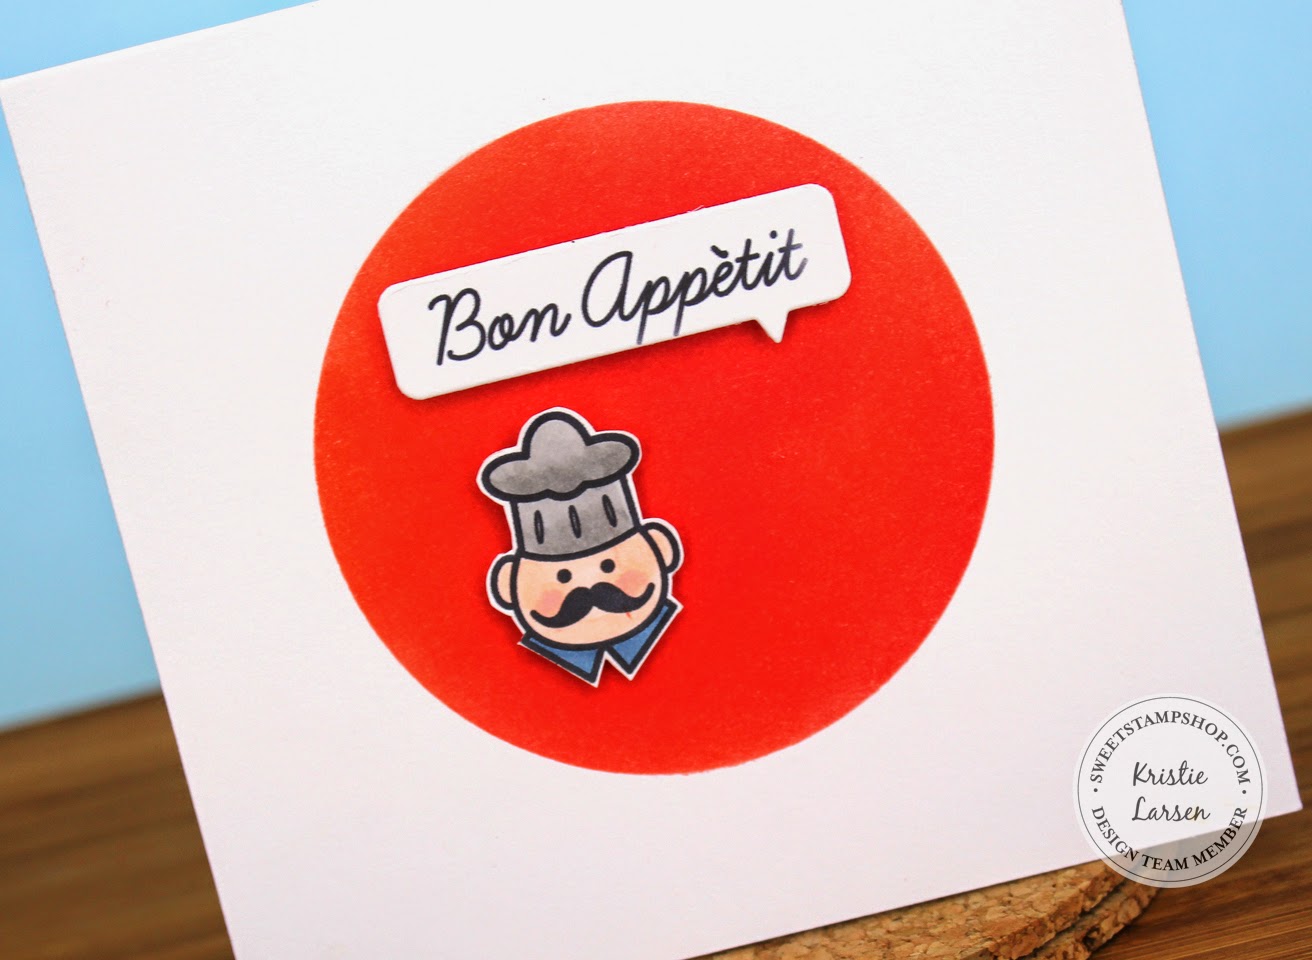
Here's just a few single shots of certain cards. I used some coloured pencils for some, but I do wish I would have just stuck with Copics for all of them. In fact, now that I realise that's what I did, I am so confused about my reasoning! Why did I decide to do that? Hmm... Just doesn't look as nice with that bold background, right? I added some Wink of Stella to this too, but you can't see it :(

I think this guy is my favourite. Every time I hear Bon Appetit, I say it 'bon appe-teezer' with a nice funny accent. And I have no idea why. This guy seems like he says it that way too...Maybe it's the moustache?

And here are all the cards together! Fun ya?


Ok... so what do you think of the new release? Have you checked them all out? Which one is your favourite? I would love to hear! Be sure to check out the Sweet Stamp Shop blog and all the other DT members creations. There is a boat-load of inspiration out there and cute stamps to be used! As well as the Sweet Stamp Shop for all your stamp needs. And I tell ya, after today's release, I think that need is huge!

Thanks for stopping by today.
Happy shopping = Happy crafting!

xoxo
k

Sep 8, 2014

Sending U Happy Thoughts: Watercolor Resist

Happy Monday! Today is just a quick card featuring a water-colour resist using rubber cement. Really easy and fun! I was just testing out the technique and thought I would share one photo.  Honestly, I took a bunch of photos but only this one with a blue background was the best. And I would retake photos and post but my kids are out of school all this week and I can't really stop in for more than a moment or two or there is complete kid mayhem!

So that's my Tip #1 for you today (about photography not kid mayhem ;)... always take pictures with a background that will help your photo pop! Blue and orange are complementary so that is why I paired these two, and why it looks good. I took a bunch of photos with a yellow background and it just muted everything so it wasn't as nice to look at. Blech!

Ok.. here's what I did... take your rubber cement and make your image. I made a big U on my water-colour paper. Then wait for it to dry. And I mean, REALLY! I know how antsy you will get, but you just gotta wait this one out folks!  Then water-colour your paper, any colours you choose. Again, wait for it to dry! Then rub off the rubber cement and Voila! You have your image revealed and the water-colour resisted. I added an addition stamp sentiment from Wplus9. Now I know this may not read the way I want it to, but its supposed to say "Sending U Happy Thoughts." Does it? I hope so.


I added some glossy accent drops to finish it off. Rounded my corners and put it on a card base. Again, let those glossy-s dry! You can see where I ruined a drop by stacking it with other cards before it was fully dry. Oops. So that's Tip #2 for you today. Drying time is painful but OH so necessary. For rubber cement, paint, glossy accents and even your nails. Get used to trying your patience!

Don't forget this week is the Sweet Stamp Shop New Release! So be sure to come back here tomorrow for some Sweet inspiration and stop by their blog to see the amazing new sets! (I believe there will be 5 for you to enjoy!)

Also this week I'm over at CutCardStock.com for my first card project They have some discounts running right now for fall coloured card stock to help you with all your fall projects. So be sure to check it out!

Thanks for stopping in and spending a moment with me. I know time is precious!
What are you up to this week? I hope there is some craftiness in your future. 

Have a good one!
xoxo
k

Sep 5, 2014

Paper Wings Productions Sept. Blog Hop

Well, Happy Friday to you all! Today is the first Friday of the month which means, it's Paper Wings Productions Blog Hop time!  If you are stopping in from Katie's blog, then you are in the right place!
If you are just stopping in today to say 'Hey!' and would like to start at the beginning, scroll down to the complete list and click away! (and Thanks for your visit!)


This month's blog hop theme is: Purple

It's funny because when I was young, purple was my favourite colour and then I didn't like it for many many, many years. But I have noticed I have been using it a lot lately! So I guess its like I am a kid again.


Don't forget you are hopping along to check out the inspiration AND to win a $25.00 gift certificate to the Paper Wings Productions online store! Woot!

For a chance to win, all you need to do is:
  • be a follower of the Paper Wings Productions blog, The Aviary
  • visit each of the participating designer's blogs and leave a comment
  • go back to the Paper Wings blog to leave us a comment telling us you completed the hop.
To increase your chances of winning you can like our Facebook page and or invite your friends to the hop! Be sure you leave a separate comment for each of your additional entries. The winners will be announce Tuesday Sept. 9th, 2014 on The Aviary.

Ok.. now that the details have been covered, here is my card for the hop:


First I took a purple piece of card stock and ran my purple/blue shades of Gelatos over it. I think there are three or four colours in there.


Then I used the background stamp from Paris Clear stamp set and some white ink to finish my background. I stamped it on the diagonal to add a little more interest since the Gelatos are running on the horizontal line. Kind of gives it some more dimension or something like that. It's one of those things that I don't know why its better, it just seems that way to me, so I did it ;)


Then I took my circle die cuts and took some parts out of my panel:


After that I folded my lighter purple card base and ran it through with an embossing folder, using a diffusion for the last circle so the lines wouldn't show up over my sentiment. The sentiment is from Vintage Technology:


And that's it! Thanks so much for visiting. Be sure to hop on to your next stop! Which should be The Aviary.

Thanks for hopping with us today!
k

(And if perchance you are lost, here is a list of the complete line up:)

Kristie (That's ME!)


 photo copyright.jpg
envye template.